
Alto Stairwell Tower Inspection Guide


This guide helps owners and operators learn how to inspect and maintain all the key components in the Alto Stairwell Tower range, ensuring safe and reliable use
Introduction
This Inspection & Maintenance guide has been produced by Lakeside Industries Ltd and is intended to be used in conjunction with ALTO Stairwell aluminium access products. Planned preventative maintenance is essential for the longevity of the product and the safety of the user. We recommend that all components are thoroughly inspected before and after use. By using the guidance detailed below, your ALTO Stairwell Tower will be maintained to a high standard and safe for use.
The ALTO range of products has been designed to require very little maintenance. Any warranty will be negated if repairs are carried out by anyone other than Lakeside Industries Ltd or a repair agent authorised by Lakeside Industries Ltd.
A downloadable version of this guide is also available Click here.
Frame Foot Assembly
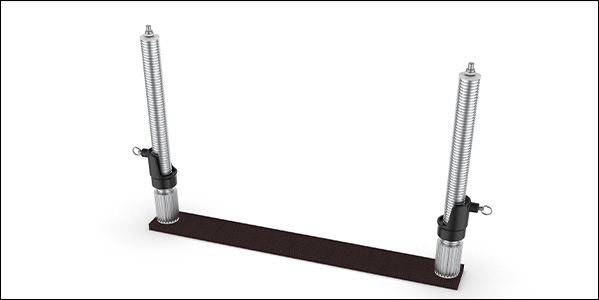
General
- Check that the 2 countersunk bolts on the underside and the nuts on the top of the legs are in good condition and are tight
- Check that the plywood is in good condition with no cracks or damage
Adjustable Legs
- Check that threads are not damaged & leg is straight
- Check weld at base is intact and undamaged
- Clean and lightly apply a penetrating lubricant to the threaded stem and all moving parts
- Fully threaded legs must have a “break” approx. 150mm from the top to prevent the casting from being removed
Adj. Collar Casting
- Check the spinning operation of the locating collar & spring action locking pin
- Check for damage and cracks in the casting
- Clean and lightly apply a penetrating lubricant to all moving parts
Frames (inc. walkthrough & Guardrail)

General
- Remove any concrete or other substances adhering to the frame
- Check for squareness and for the straightness of frame - left-to-right and top-to-bottom
- Check all welds are sound and intact
- Check in particular for any dents, creases or crushes
Uprights & Conical Head Fittings
- Check for any damage to uprights
- Check the head fittings are undamaged & the condition of the pegs on the head fittings
- Check the weld where the upright meets the casting
- Check the locating holes in the base of the upright
- Check in particular for any dents, creases or crushes
Rungs & Ladder Frames
- Check for any damage to horizontal rungs
- Check ladder rungs are not damaged and secure
- Check vertical stiles are straight, not damaged, and welds are intact
- Check in particular for any dents, creases or crushes
Walkthrough Frames
- Check for any damage to the top horizontal rung
- Check frame uprights are square and parallel
- Check vertical stiles are straight, not damaged, and welds are intact
- Check in particular for any dents, creases or crushes
Guardrail Frames
- Check for any damage to horizontal rungs
- Check stiffener bars are undamaged & welds are intact
- Check in particular for any dents, creases or crushes
Braces
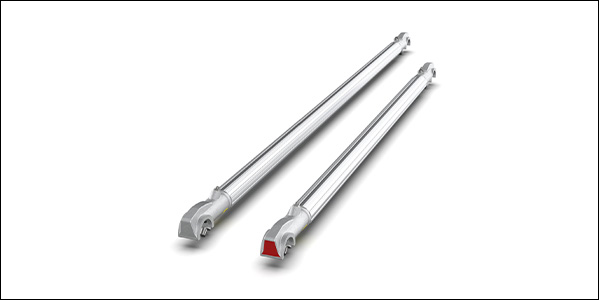
Hooks
- Check hooks to ensure there is no distortion/cracking
- Ensure that the latch bolt & nut are in good condition and operate freely
- Remove all concrete or other substances adhering to the hook
- Lightly apply a penetrating lubricant to the pins/springs
Tubes
- Check that the brace tube is not bent, damaged or distorted and that there are no dents greater than 5mm
- Remove all concrete or other substances adhering to the tube
Brace Frames
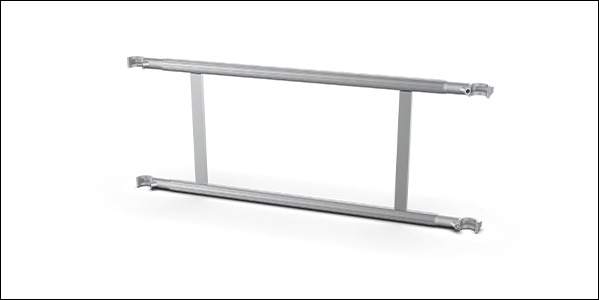
General
- Check that the brace tube is not bent, damaged or distorted and that there are no dents greater than 5mm
- Remove all concrete or other substances adhering to the tube
- NOTE: Brace hook pins are only installed in 2 opposite hooks - not all 4 hooks
Hooks
- Check hooks to ensure there is no distortion/cracking
- Ensure that the latch bolt & nut are in good condition and operate freely
- Remove all concrete or other substances adhering to the hook
- Lightly apply a penetrating lubricant to the pins/springs
Platforms
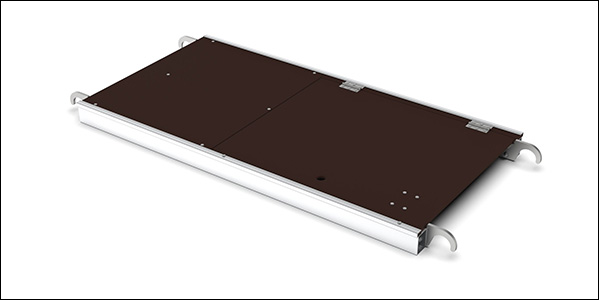
General
- Check for distortion in all directions
- Check for any damage to plywood, aluminium and hooks
- Check 4 welds on the underside are intact. If the welds are cracked, do not use
- Check all fastenings/rivets are tight and secure
Trap Lid
- Check that the trapdoor is in good working order and the plywood is not damaged
- Check hinges are working and rivets are fixed securely
- Check door latch engages correctly and locks/unlocks
- Check for distortion in all directions
Toeboards
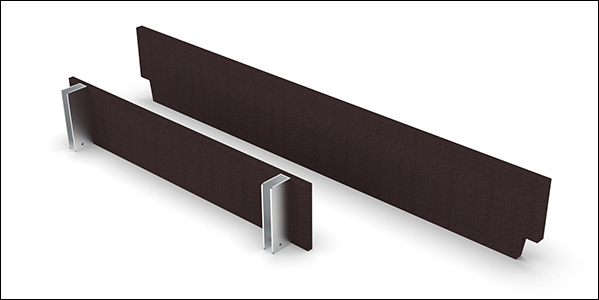
Sides
- Ensure there is no distortion/damage to the plywood
- Remove any concrete or other substances adhering to the toeboard
- Check notches in bottom corners are free from damage and delamination
Ends
- Ensure there is no distortion/damage to the plywood
- Remove any concrete or other substances adhering to the toeboard
- Ensure all securing fixings are intact & secure and that the ‘c’ channels are clear of all obstacles to allow sides to be easily inserted
Stabilisers
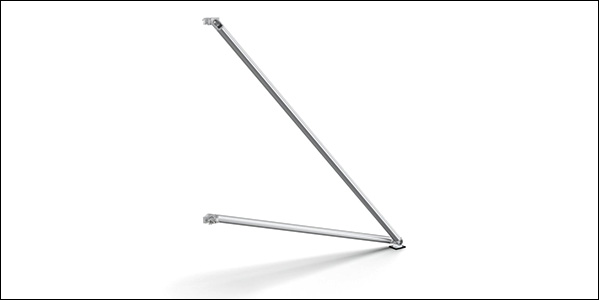
Tubes
- Remove all concrete and other substances adhering to the stabiliser
- Ensure that the tube is not bent, damaged or distorted, and there are no dents greater than 5mm
Clamps
- Check that the bolts, wing nuts and swivel couplers are secure, operate freely and are not corroded
- Check that the castings are not damaged
Foot
- Check that the castings are not damaged
- Check that there is no local damage to the tee foot
- Check the rubber pad is in good condition and still fixed to the tee section aluminium
Clip-on Ladder
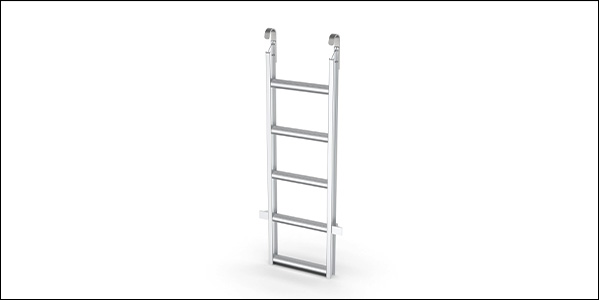
Hooks
- Remove all concrete and other substances adhering to the hooks
- Check for any corrosion to the hooks/rivets and that all rivets are intact and secure
- Check for any distortion to the hook, ensuring that a frame rung fits all the way inside the bend
Framework
- Remove all concrete and other substances adhering to the ladder
- Check for damage/distortion to all components
- Check all welds between the rungs and the stiles
Additional Guidance
Where the equipment forms part of a hire fleet, the equipment should be inspected as detailed below by the hire company on return from each hire contract. As with all construction industry equipment – and in particular items relating to working at height, it is vital that only fault-free, undamaged items are deployed in accordance with the assembly guide to preserve the integrity of the structure, the safety of the users and those around them.
The ALTO Stairwell Tower System components have been subjected to rigorous testing to determine and prove their reliability, safety & capacity. The construction & facilities management industries where this equipment is typically deployed can be demanding environments, and there are occasions in which damage occurs – either through accident or misuse. Serious misuse through significant overloading or use for inappropriate tasks can impair the integrity of components.
Equipment must be inspected post-use properly so that remedial action can be taken. Equipment that has been misused may be unsafe and should not be used. No liability will be accepted in relation to equipment that shows signs of misuse. Any product or component which fails any of the inspections set out in this document must be withdrawn from use and quarantined for further inspection, repair or replacement as appropriate.
ALTO Stairwell Tower System equipment should not be modified in any way and should only be repaired by the manufacturer - Lakeside Industries Ltd - or by authorised agents. If it is suspected that equipment has been modified or repaired by any other provider, the equipment should be quarantined and returned to Lakeside Industries Ltd for free inspection. No liability will be accepted in relation to equipment that has been subjected to unauthorised modification or repair.